
Acrylic Pouring is really very popular at the moment. I have already made a basic video about it in summer 2019. So it is high time to write a step-by-step article.
Flip Cup Pouring is a very basic technique that can be explained easily and quickly. It is absolutely suitable for beginners. Basically, it is about elegantly placing a cup of different colours, carefully layered on top of each other, on a canvas. So far so good. So let’s start at the very beginning:
Preparation
First of all, you should prepare your workplace. This includes getting yourself a pouring-safe underlay. For me, a flat cardboard is usually sufficient, over which I lay a foil. When pouring, it is completely normal that paint runs off the picture and drips off. You do not want to have to wipe this paint off the table later.
You then place your canvas on the base. The canvas should not lie directly on the surface, because then it is difficult to grab it later. You can put it on upside down paper cups, or just put some bigger pinboard pins from behind into the stretcher frame. I discovered this one for me: Wooden corkboard pins ( Advertisement)
After the preparation this should look like this:
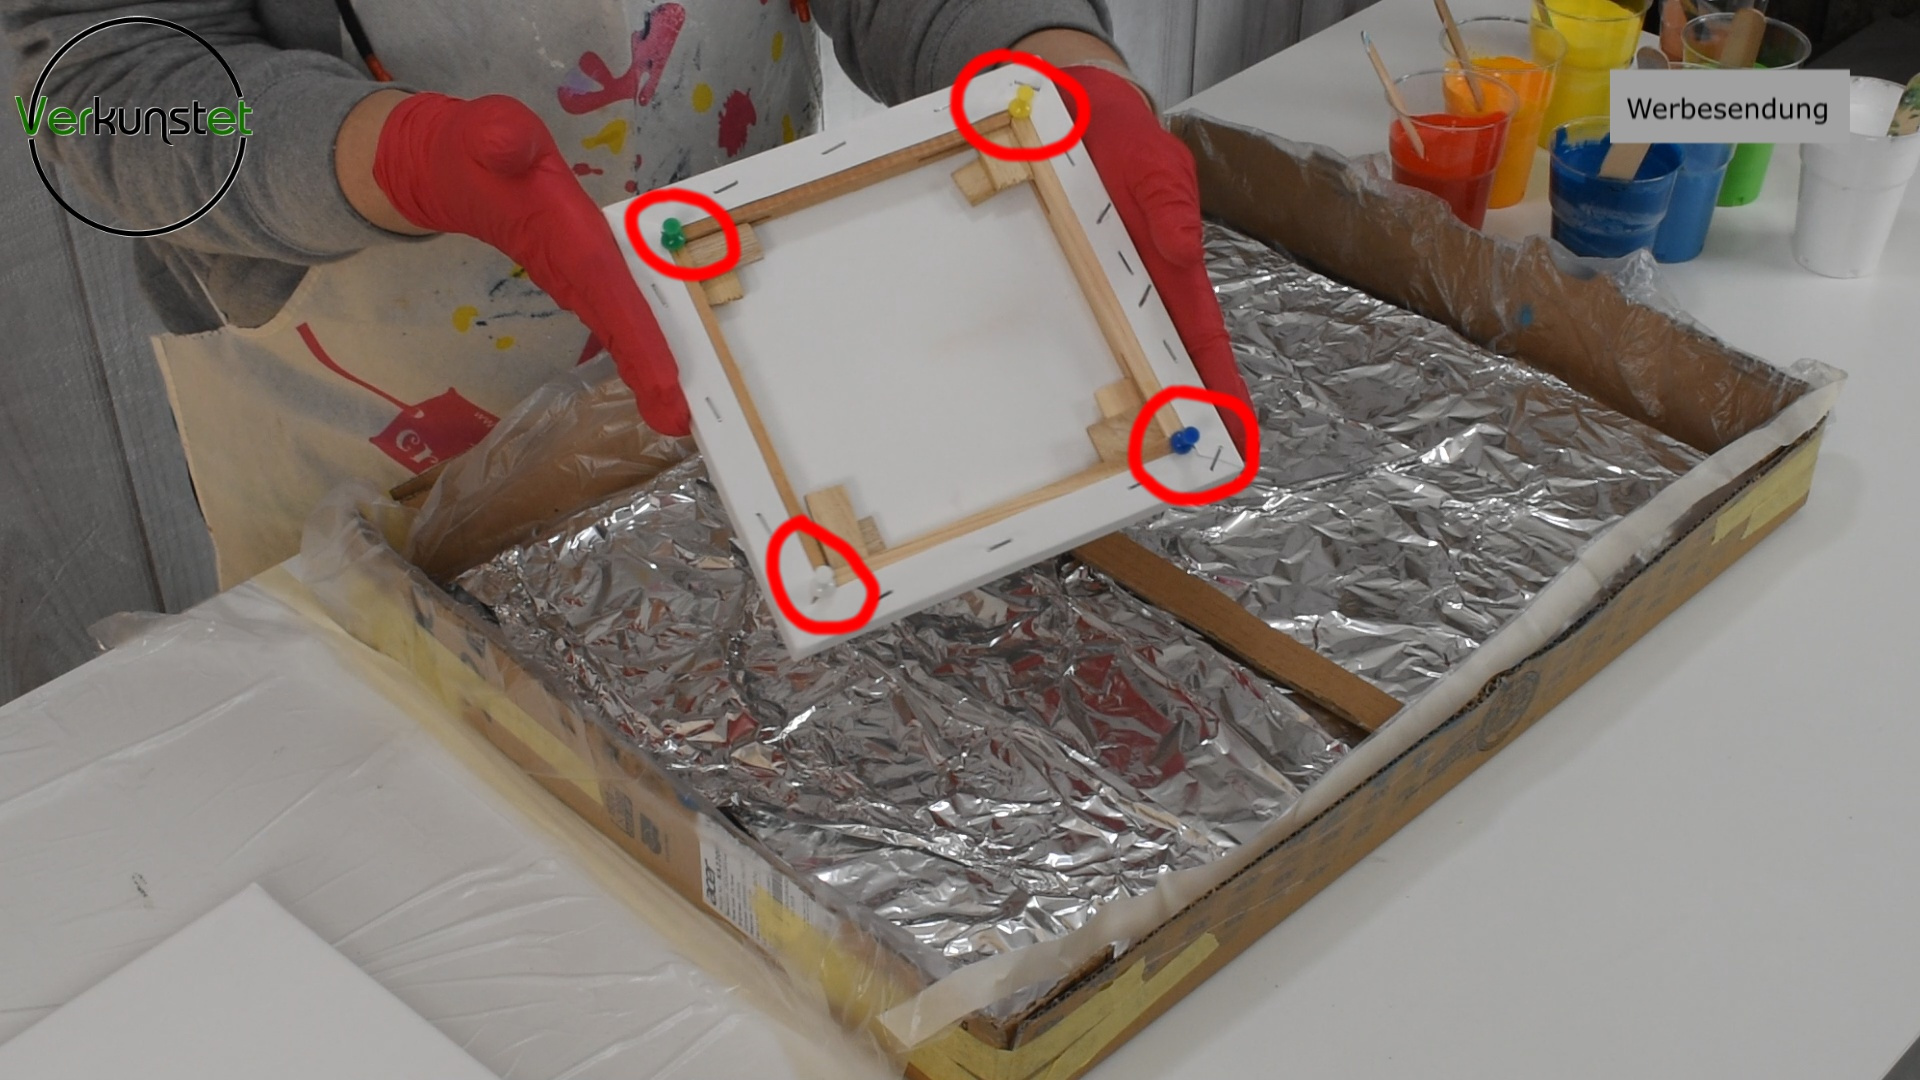
Prepare the canvas
Mixing the paint
It is then time to mix the individual colours. Each colour you want to process should have its own cup. Don’t take too many different colours in the beginning and learn little by little what goes well together.
Mixing colours correctly
- Mix acrylic paint and pouring agent 1:1
Stirring time
- At least one minute per colour
Water addition
- Adjust by feel - The mixture must not become too liquid.
Each colour is mixed with the pouring medium in a 1:1 ratio. You can then adjust the mix with a little water so that the mixture is liquid. But not too much water, because then you destroy the pigment - the colour does not look nice anymore but dull. Make sure that everything is stirred well. It’s best to stir for at least a minute and also take everything at the bottom of the cup and in the “corners” and along the edges. This is important.
If you like and want to have beautiful colour cells in your pouring picture, add a drop of silicone oil to the colours. But not too much, then you get a “dot desert”. The silicone oil is added quite at the end, you don’t have to stir it for a very long time. Since silicone oil can evaporate if it is warm enough, it shouldn’t take too long between adding it and the pouring itself. This is especially true if you use silicone spray instead of silicone oil. The propellant can make it “disappear” even faster.
Start the pour
Once you have mixed the colours, take an empty cup large enough to hold all the paint you want to use.
Into this cup you will gradually layer small portions of the mixed paint. You do this carefully so that the colours in the cup do not mix. If you find it difficult, hold a spoon or wooden spatula just above the paint in the collection cup and carefully pour the new portion of paint over the spoon or spatula into the cup. This slows down the new paint and prevents it from mixing.
Flip Cup
To get the collection cup full of paint on the canvas now, place the canvas on the full cup and press on the canvas from the other side.
Then you turn the whole thing upside down. While doing this, press the cup further onto the canvas. The canvas with the cup, which you keep pressing against it, can then be placed on the screen. Give the paint at this point some time to collect on the underside. You can support this by gently tapping the cup from above a few times.

Initiate the flip cup
Pouring
When you and the paint are ready, you pull the cup away from the canvas and the paint flows over the canvas.
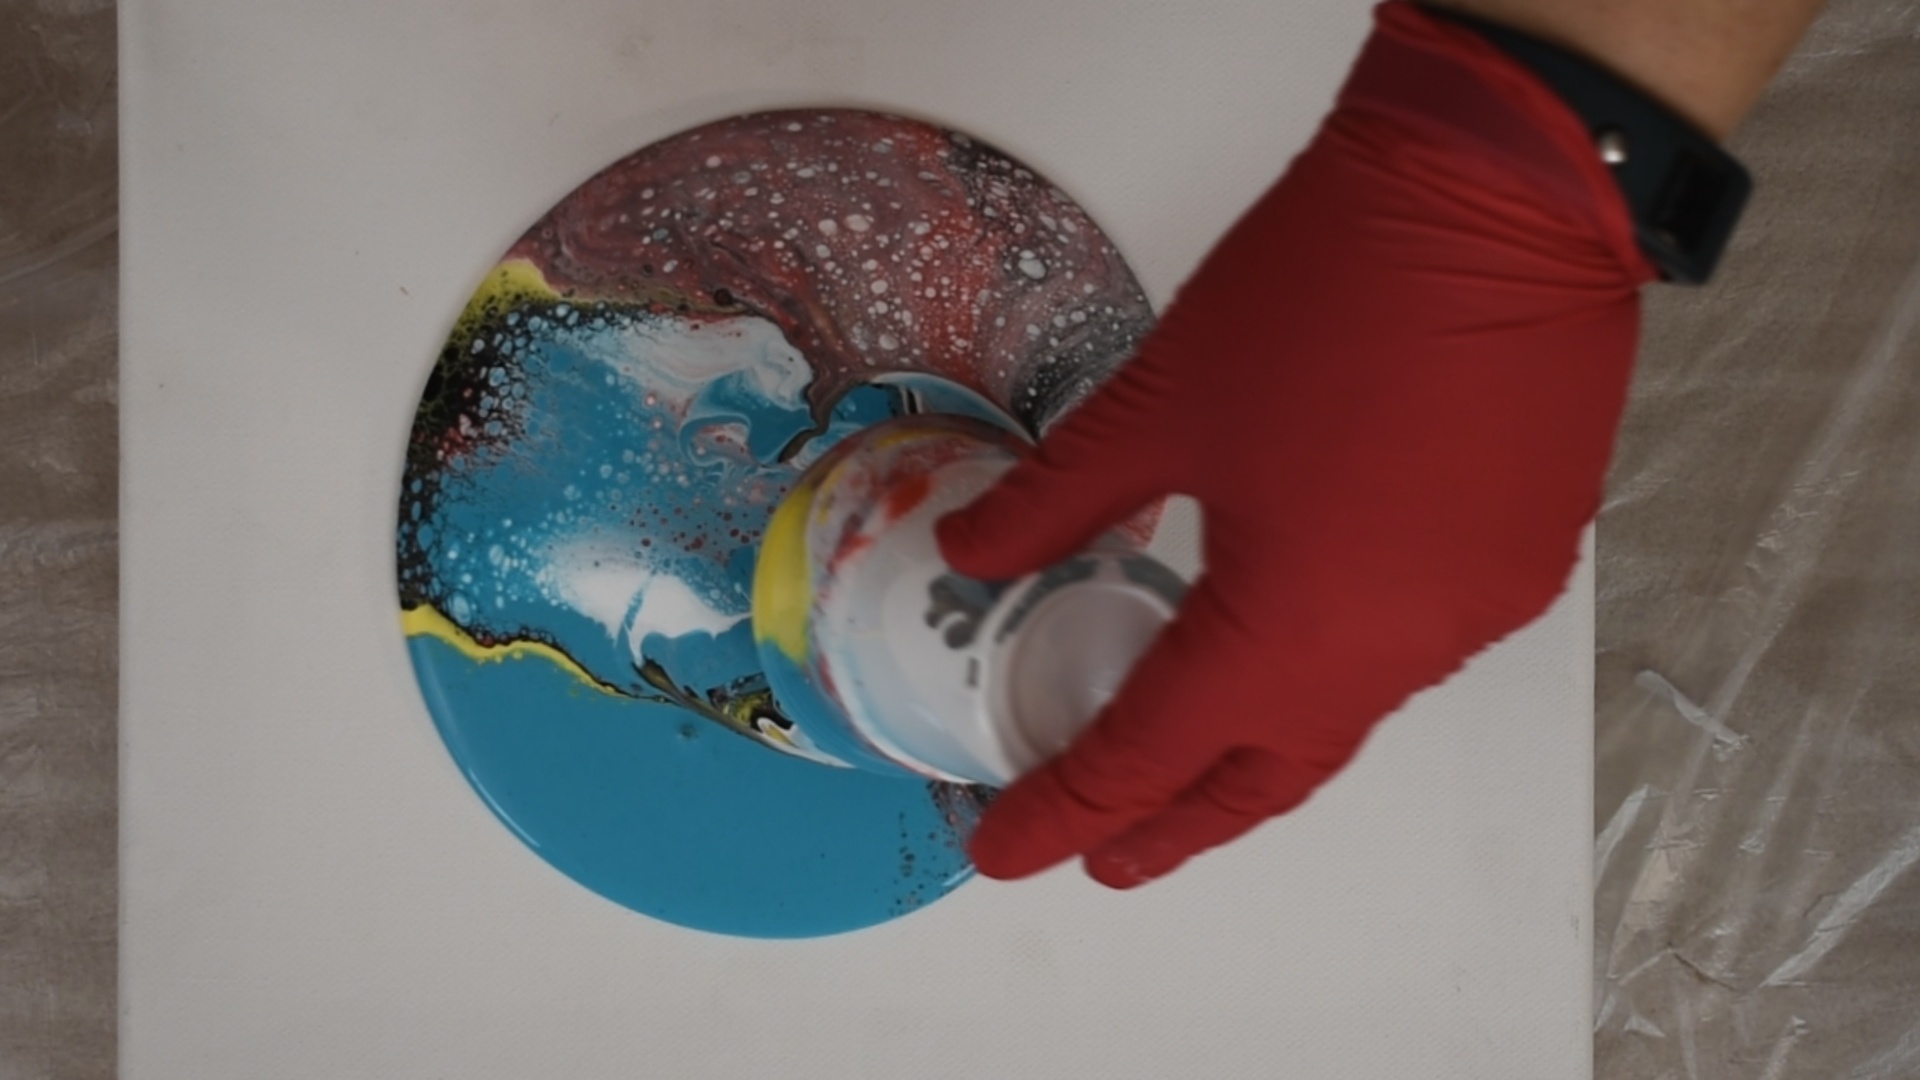
Pull off the flipped cup
Here in the picture you can already see the spontaneous cell formation by the silicone oil:
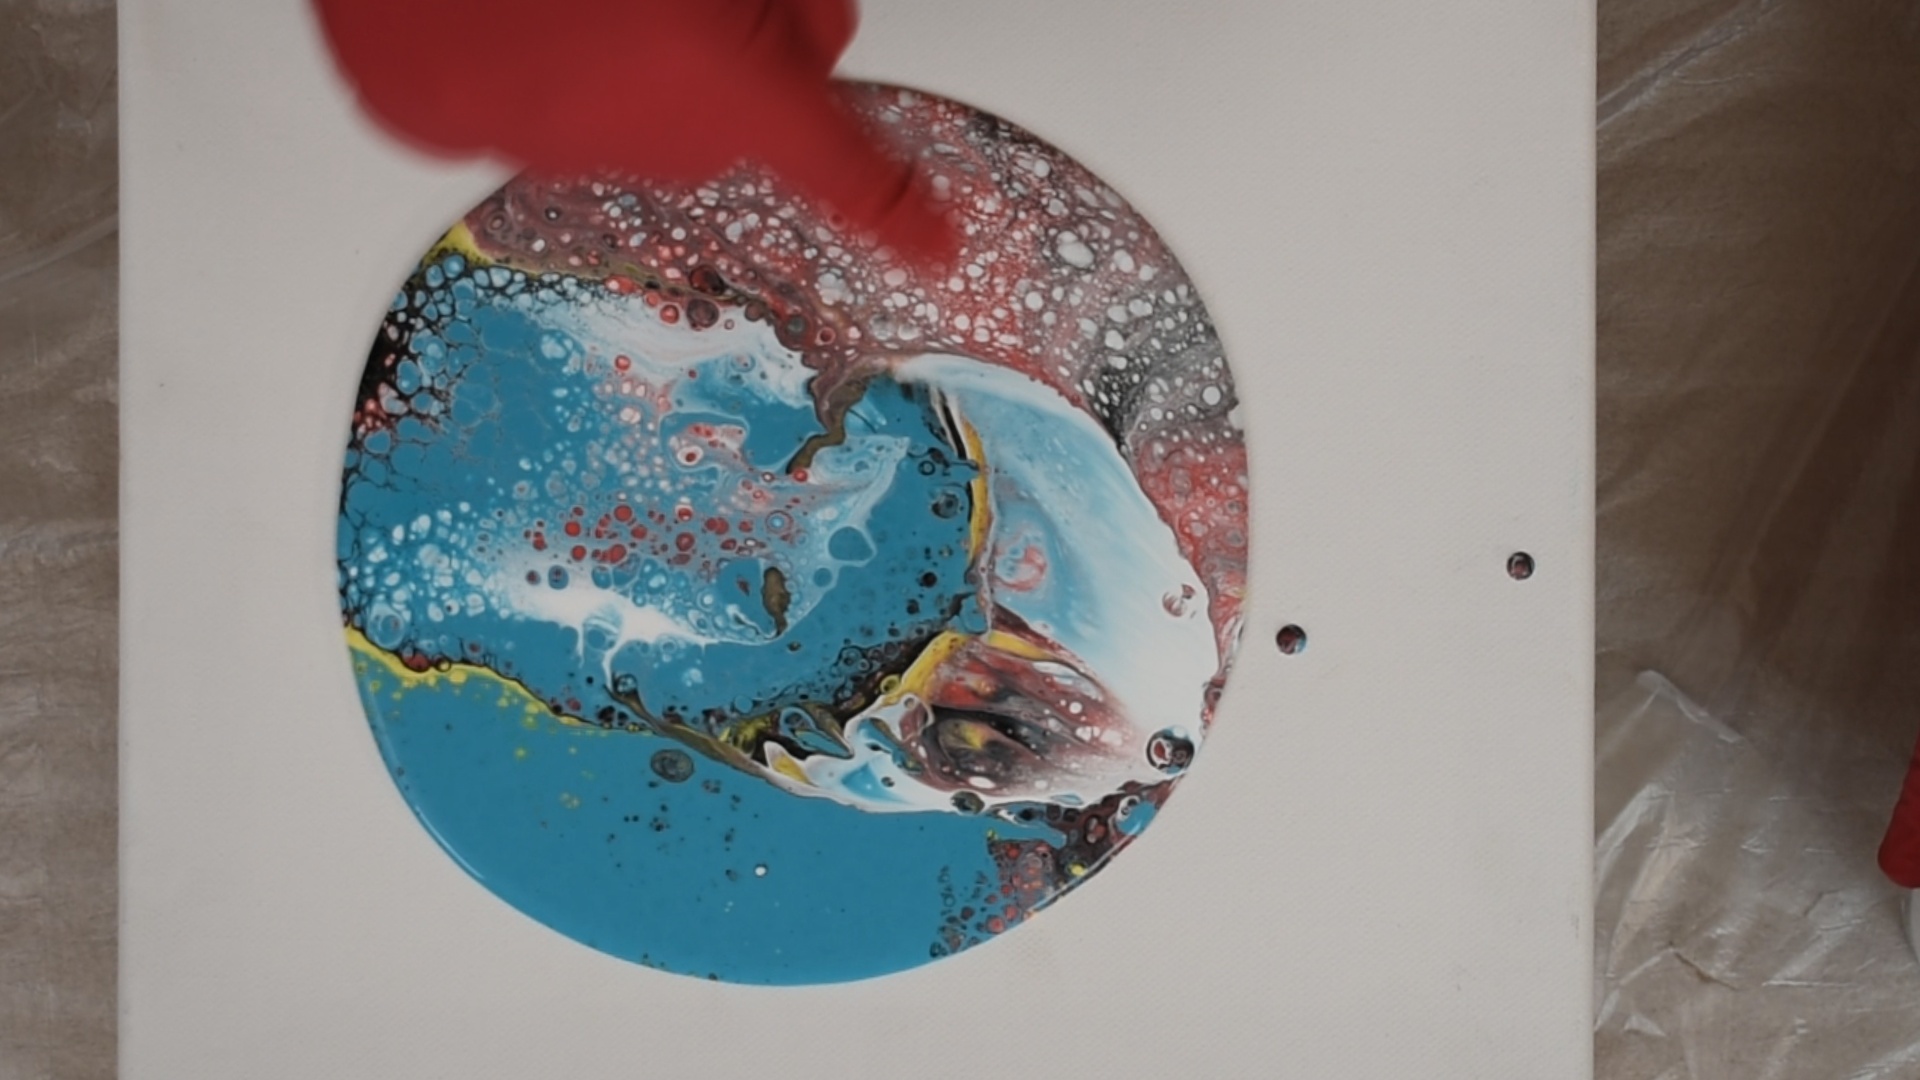
Spontaneous cell formation during Flip-Cup Acrylic-Pouring
When the paint has settled down a bit, you can carefully lift the stretcher frame and, by slightly tilting it to the different sides, get the paint to gradually fill the whole area. Here slow work with a little patience is advantageous, so that the cells are not destroyed, too much paint runs off or the colours mix after all.
You will notice that the picture changes with every movement. In the beginning most of them are too fast - take your time. You will see, with a little practice this works very, very well.

Spread the colours on the canvas
I always make sure that as much colour as possible goes everywhere. If the paint is not enough, you can mix a little more paint if necessary and apply it to the empty area. If you do this with care, you usually don’t see anything of this correction afterwards.
Finish line
At the end I still go there and go over the still fresh paint with a hot air blower or a flambé burner. This activates the silicone oil again and removes water from the picture. At the same time small bubbles often disappear and the surface becomes more even. You should not get too close with the burner, because we do not want to burn the painting. This also applies to the hot air blower, because you don’t want to move the colours with it - too short “blow-drying”.
Talking about hairdryers: You can also use a hairdryer. If it can be set to work on a high heat without a lot of wind, that’s also possible. But I seldom manage not to mess up the hairdryer with colour sooner or later, so I have my own “art device” for this kind of thing where it doesn’t bother me any more.
Drying time & paint residues
The image should then dry out completely. This takes two to five days, depending on the size, amount of paint and temperature.
The paint residues should also dry through and be disposed of in the household garbage, unless otherwise specified in your municipality. Under no circumstances should you put them in the drain. The stuff becomes as tough as rubber and clogging is inevitable.
For an overview and as a service I have put together a collection of my touring tools in my Amazon Storefront: verkunstet-Storefront ( Advertisement)